Installing the HP MediaSmart Server 2.5 Update on the EX47x
Contents
Introduction
When HP released the HP MediaSmart Server 2.5 Update for the EX48x machines, they also announced the full software would not be available to first generation users. Based on that statement, Nigel Wilks (Cougar) and Alex Kuretz (Yakuza) started work on a way to make the update available to EX47x owners, dubbed "SanEncore" after the code names for the EX47x (San Juan) and the EX48x (Encore).
Cougar and Yakuza have also developed a Windows Home Server Add-In to fake the Update package into thinking it is running on a 2.1 machine, and handles some of the missing configuration items so that the 2.5 update is sucesful.
This Add-In does not utilise any HP code, or intellectual property and has been solely developed by the authors.
This is work in progress, so feedback and enhancement requests are welcomed on the forums.
Prerequisites
Because of the differences between the installed applications on an EX47x and the EX48x it is necessary to install a few applications before the update can be applied. These are Open Source applications, and do not require payment.
The applications and versions in question are: -
and finally, the update itself.
Download each of the above to your servers software folder (i.e. \\hpserver\software), the Add-In needs to be downloaded to your servers Add-In folder (i.e \\hpserver\software\add-ins).
Preparing for the update
Twonky
Before you start, you must (if you haven't already) install the "PVConnect Media Server for HP MediaSmart" (Twonky) Add-In that was delivered as part of the HP MediaSmart Server 1.3 Update.

Java Runtime Environment
- Open a Remote Desktop connection to your server.
- Click on Start, Run and type \\HPSERVER\software (replace HPSERVER with your own server name)
- Drag the "jre-6u5-windows-i586-p-s.exe" file onto your servers desktop.
- Right click on the "jre-6u5-windows-i586-p-s.exe" file that now resides on your servers desktop, and click on the Unblock button and then OK.
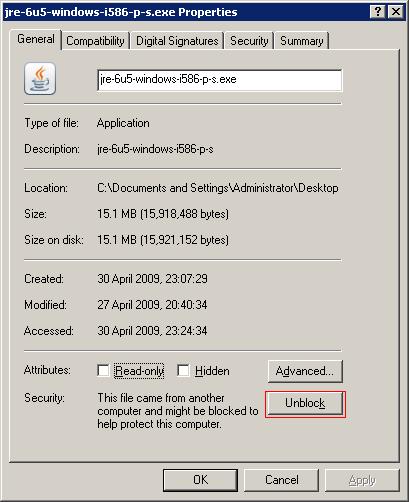
- Now double click on the "jre-6u5-windows-i586-p-s.exe" file to run the application.
- Click on the Show advanced options panel check box, and then click Accept to accept the license agreement

- Ensure the path is set as "C:\Program Files\Java\jre1.6.0_05" and click Next

- Java will now install, when completed click Finish.


Apache Tomcat
- Click on the Servers software folder you still have open, and drag the "apache-tomcat-6.0.18.exe" file onto your servers desktop.
- Right click on the "apache-tomcat-6.0.18.exe" file that now resides on your servers desktop, and click on the Unblock button and then OK.

- Now double click on the "apache-tomcat-6.0.18.exe" file to run the application.
- Click Next and then Agree to the license terms.
- Change the type of install to Full, and click Next.

- Ensure the path is set as "C:\Program Files\Apache Software Foundation\Tomcat 6.0" and click Next
- Change the port to 8089 and click Next

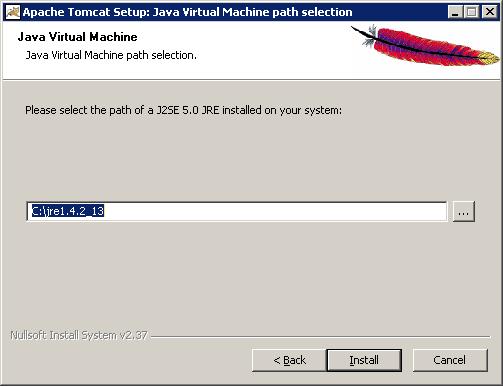
- Change the path you are shown to C:\Program Files\Java\jre1.6.0_05 and click install.
- Uncheck the Show Readme box and click Finish


ImageMagick
- Click on the Servers software folder you still have open, and drag the "ImageMagick-6.5.1-7-Q16-windows-dll.exe" file onto your servers desktop.
- Right click on the "ImageMagick-6.5.1-7-Q16-windows-dll.exe" file that now resides on your servers desktop, and click on the Unblock button and then OK.

- Now double click on the "ImageMagick-6.5.1-7-Q16-windows-dll.exe" file to run the application.
- Click Next and then Accept the agreement.
- Click Next
- Ensure the path is set as "C:\Program Files\ImageMagick-6.4.0-Q16" and click Next

- Click Next to accept the Start Menu item default
- Click Next to accept the default Additional Tasks and click Install
- On completion, click Next and clear the check box to view index.html

- Uncheck the Show Readme box and click Finish


SanEncore Add-In
- On your desktop, open up your WHS Console Application and click Settings, Add-Ins.
- Now click on Install in the SanEncore Add-In option.

- When the add-in is completed, click OK to restart the console.

HP MediaSmart Server 2.5 Update
You are now ready to install the Update!
- Click on the Servers software folder you still have open, and drag the "MS251027311ServerUpdate.exe" file onto your servers desktop.
- Right click on the "MS251027311ServerUpdate.exe" file that now resides on your servers desktop, and click on the Unblock button and then OK.
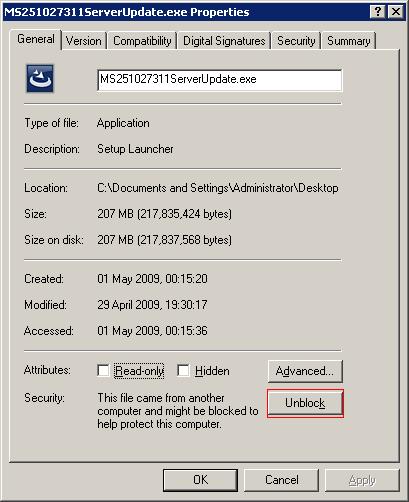
- Now double click on the "MS251027311ServerUpdate.exe" file to run the application.
- The Update will launch.

- And you will be presented with a Welcome Screen - DO NOT CLICK NEXT.

- Click on the Start button, Run and type %temp% and OK
- Now find a folder that was just created and open it.
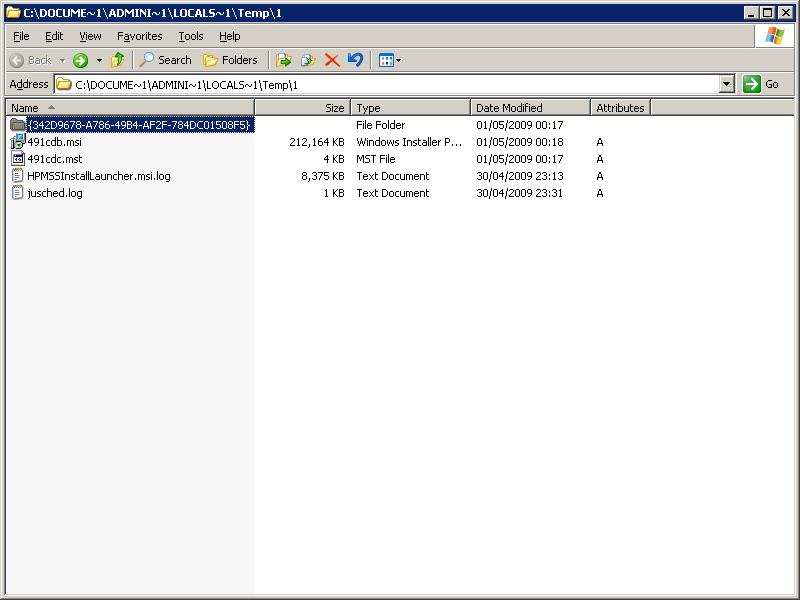
- Right click on "HP MediaSmart Server 2.5 Update.msi" and choose copy.
- Now right click on your servers desktop and choose paste
- Once the file is on your desktop, you can go back to the update screen and choose Cancel. Then Yes to confirm, and finally click the Finish button.
- Now double click on the "HP MediaSmart Server 2.5 Update.msi" you placed on your servers desktop.
- You can now click Next

- Now click Install


Known Issues
The Health lights on the server will not currently function due to the differing hardware. This is currently a limitation of the SanEncore update, and will be researched further.