Creating the Wordpress Database and User Account using PhpMyAdmin
From MediaSmartServerWiki
After installing Wordpress on Windows Home Server, you need to create a database and a user account before running Wordpress for the first time.
First, you need to logon to PhpMyAdmin. If you have installed MySql using the MySql Installer for WHS Add-In, you can do this by running https://servername/pma (replace servername with your own servers name).
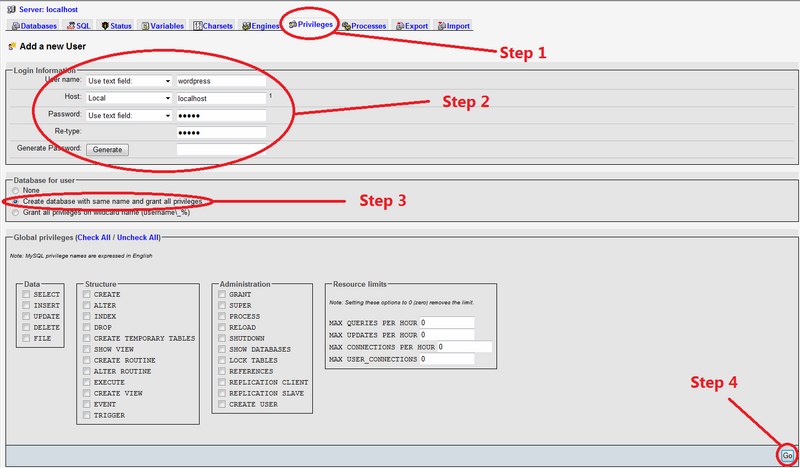
Now, refer to the screen print above and follow each step highlighted in Red.
- Step 1 - Click on Privileges then click Add a new User.
- Step 2 - Type in your desired User name (wordpress is a good one) and ensure Use text field is selected. Ensure Host is set to Local from the drop down list and the text box will change to localhost and enter a Password and then confirm it in the Re-type box. Ensure the Password Use text field is also selected.
- Step 3 - Click on Create database with same name and grant all priviliges.
- Step 4 - Click on Go.
If you've followed all the steps above you've now created a user account and a database ready for running Wordpress.
