Between work and family life things have been a little crazy of late. I did take a few days off from work last week though and found some time to work on a few “major” projects around the house. I don’t consider myself the least bit handy, so what may be “minor” for some people is probably a major endeavor on my part! The projects included running coax/cat6 wiring, mounting a TV, and upgrading the CPU on my Windows Home Server (upgrading the CPU is probably the one item I would not consider a major project as I am very comfortable working with PC hardware). The first two projects I was very tempted to just hire someone to handle, but after getting a price quote of $350 from Best Buy to mount my TV and expecting that running wires would probably equal or exceed $350 I decided it was time to go the DIY route.
Project #1 – Wiring:
All this came about because the wife and I decided to rearrange the furniture in our bedroom. We had a coax and cat5e connection on one wall where our TV was connected. Once we decided to move the furniture around this meant our TV would need to go on a different wall where there were no connections. Running the wires along the wall or under the carpet was not feasible, so my only real option was to re-route the wires from one wall to the other via the attic.
Tools Used (what I can think of off the top of my head):
- Drywall Saw
- Drill
- Level
- Screwdriver
- Stud Finder
- 50ft RG6 (18AWG) 75Ohm, Quad Shield, CL2 Coaxial Cable with F Type Connector
- Cat6: 23AWG 4 pair solid wire UTP
- Wall Plate for Keystone, 3 Hole – White
- Wall Plate for Keystone, 2 Hole – White
- Cat6 RJ-45 Tooless Keystone – White
- Cat6 Plugs
- Keystone Jack – Modular F Type (White)
- PREMIUM 2 way Coax Cable Splitter F type Screw – 5~2400 MHz
- Modular Crimping Tool for RJ45 plugs
- Cable Stripper
- 1-Gang Outlet and Switch Box
- Circle Cable Clips
- Cat5e/6 Cable Tester
- Fish Tape (I happened to have 3 x 4ft steel rods so instead of getting fishing tape I simply taped these rods together for fishing the wires through the wall)
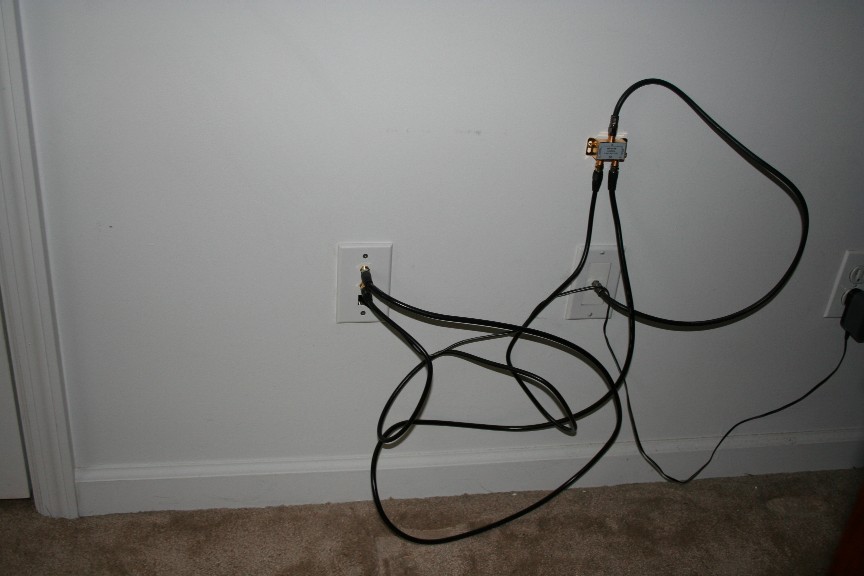
Below is a picture of the wall where the original connection is (and where my TV was originally). The coax connection at the right is the main coax line coming into the room. The reason why I have a splitter is because coax was run to the room below a few years back, and the easiest method was to split the bedroom line. So with the splitter two coax lines go to the plate at the left. The first connection goes into the closet right behind the wall and connecting to the line I will be running through the attic. The second connection is the one that goes to the line run in the room below. The third space on the wall plate is empty now (originally this is where the cat6 RJ-45 connector was but I pulled that out into the closet for the cat6 line run). Instead, since I will have a switch in the closet but no electrical outlet in the closet I used the empty space to run the DC adapter line from the bedroom outlet to the closet. It looks a little messy and I may get some shorter coax lines, but you can’t see any of this as it is hidden behind furniture.
Here is a picture of the closet which is on the opposite side of the wall above. The blue cat6 patch cable connects the cat line that was in bedroom into the switch. I then have connected to the switch the new cat6 line I am running into the attic (when I terminated the new cat6 line to attach the plug I followed this guide, going with 568-B wiring). Also the coax line from the bedroom gets connected to the new coax line which is being run into the attic. The coax and cat6 lines to the right of the switch run up the closet wall and into the attic through the ceiling. The reason why I am using a switch instead of just connecting the new cat6 line to the old one is because if down the road I run cat6 lines in the remaining bedrooms I can just feed them through the switch.
Navigating through the attic was a little tricky. My bedroom has a tray ceiling so the spacing in the attic gets tight very quick (especially with the duct work). The coax/cat6 lines were run from the back right of the attic across the top of the ceiling to the wall where I wanted to drop the wires down. Here I had to use a drill to make a hole in the beam so I could fish the wires through.
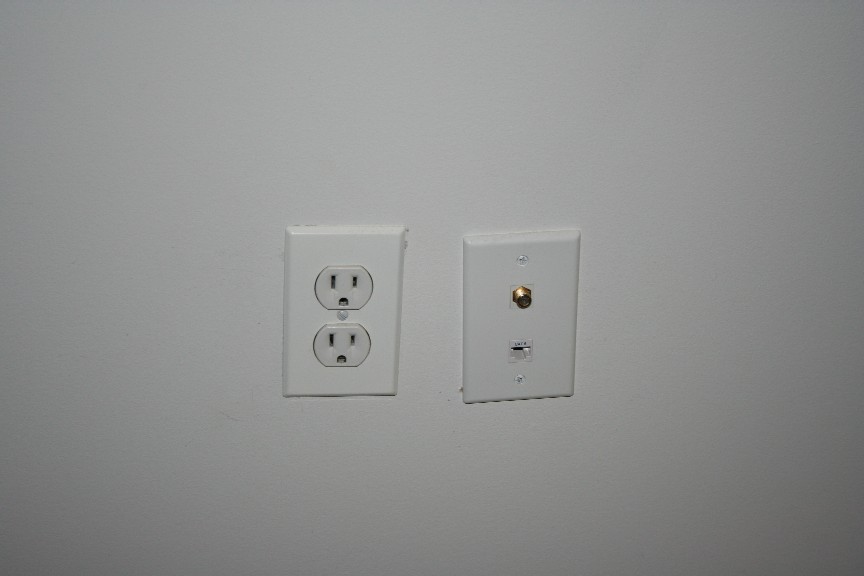
The finished product which has the new coax and cat6 connection coming from the attic. It came out a little crooked but I like to think it is straight and the electric outlet the builder installed is crooked ![]()
When I first started this project I must admit I was a little intimidated since I had never cut into a wall or fished wires through a wall. Overall, I am glad I took this on instead of forking over hundreds of dollars to someone else. Probably the most frustrating part of this project was terminating the cat6 line for the modular plug as I went through several plugs and several cable tests (definitely make sure you leave yourself some extra slack on the lines to work with).
Project #2 – Mounting A TV
One of the benefits or rearranging the bedroom furniture is that with the new layout the TV we had in the room was too small (I welcome any excuse to buy a newer/bigger TV!).
Tools Used:
- Level
- Stud Finder
- Adjustable Tilting/Swiveling Wall Mount Bracket for LCD Plasma (Max 175Lbs, 32~60inch) – Aluminum Arms
- Drill
- Socket Set
To locate the studs in my wall I was originally going to go with the knuckle method (i.e using your knuckles to determine where the studs are in the wall) but since I needed to be as accurate as possible capturing the center of the stud I figured this was not the best method. Instead I purchased a stud finder from Home Depot. I gave it a few good passes on my wall but kept getting inconsistent results, so I decided to just open up the wall and see what was there. Turns out the stud finder was more accurate then I expected because I found Fabio hiding in my walls ![]()
Once the Fabio situation was taken care of I was able to get back to work and get the wall mount up. The biggest challenge (and probably stupid on my part) was trying to install the wall mount by myself. The mount itself probably weighs in excess of 60 lbs, but I had no patience to wait for a second hand. After a lot of sweat and tears I was able to properly locate all the holes on the studs and secure. I just used the hardware that Monoprice provided, but I may replace the bolts (a few reviewers recommended getting better bolts, and one of the bolts did break off while I was fastening which I had to replace).
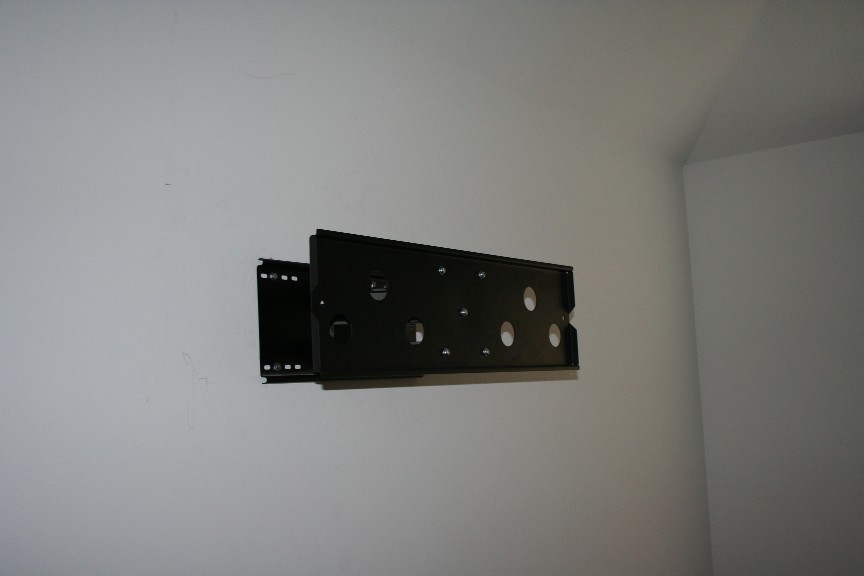
The wall mount from the side.
With the TV mounted.
The wires are a little bit of a mess (with the issue I note in the next paragraph keeping me from setting everything back up) so I am trying to decide what approach to take. I was planning on just getting a cable raceway to cover the wires (I would run the raceway vertically and have it centered with the TV. My walls are still the factory white so the raceway would blend in nicely. This was my plan as of this morning (was actually planning a trip to Home Depot after work to pick up). However, I need to add a center channel speaker to my setup and now I am thinking that maybe I should go with an in-wall speaker. If I did that the center speaker would go right below the TV which then means the cable raceway would not be able to go there (the raceway would probably look silly if it was not centered with the TV). If I don’t do the cable raceway then I will have to run the wires behind the wall. Of course the third option is to get a center channel (not in-wall) which would still allow me to do the cable raceway. Not sure what direction I am leaning towards yet.
UPDATE – OK, I just paid Monoprice a visit this morning and ordered an in-wall center channel. Stay tuned for more details!!!
Of course the other issue I ran in to, the media cabinet you see below the TV we just got (it is part of our bedroom collection from Thomasville). The problem is I just assumed that it would fit all my equipment until I tried to put my Pioneer A/V Receiver in there. Unfortunately my Receiver is approximately 3 inches too deep. I can remove the back of the media cabinet to get more room, but too much of the Receiver hangs off the back for my comfort. I figure I have 15 inches to play with depth-wise in the cabinet, so I just ordered an Onkyo Receiver that measures in at 12.9 inches deep. Looks like I will just have to sell my Pioneer Receiver on eBay to cover the cost of the Onkyo purchase. This may actually not be a bad thing. The TV I purchased is a 3D TV which came bundled with a 3D BluRay player. Turns out you cannot play back 3D via your Receiver if it is not HDMI 1.4 (which my Pioneer wasn’t). The Onkyo Receiver is HDMI 1.4 which means I can run HDMI directly from the BluRay player to the Receiver without issue.
Project #3 – Upgrading My Windows Home Server CPU
My next project, which has been sitting on my desk for about a month now, was to upgrade the CPU on Shawshank. I had a dual core AMD CPU which was more then adequate for media streaming duties. However, I have been wanting to move some more CPU intensive processes over to my Windows Home Server from my desktop PC (such as encoding/transcoding, commercial detection, etc…). I decided to go with a quad core AMD CPU to fit my needs:
Tools Used:
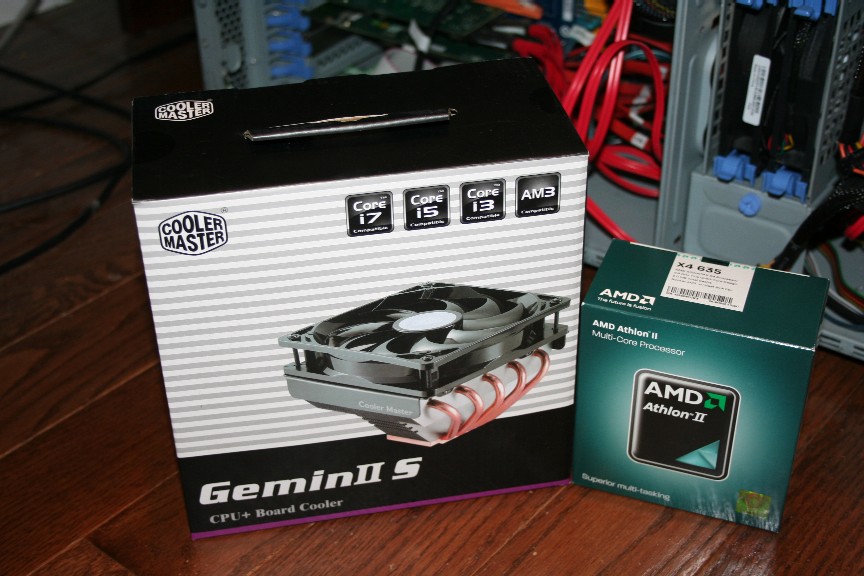
- Cooler Master GeminII S 120mm CPU Cooler
- AMD Athlon II X4 635 Propus 2.9GHz Quad Core CPU
- Artic Silver 5 Thermal Compound
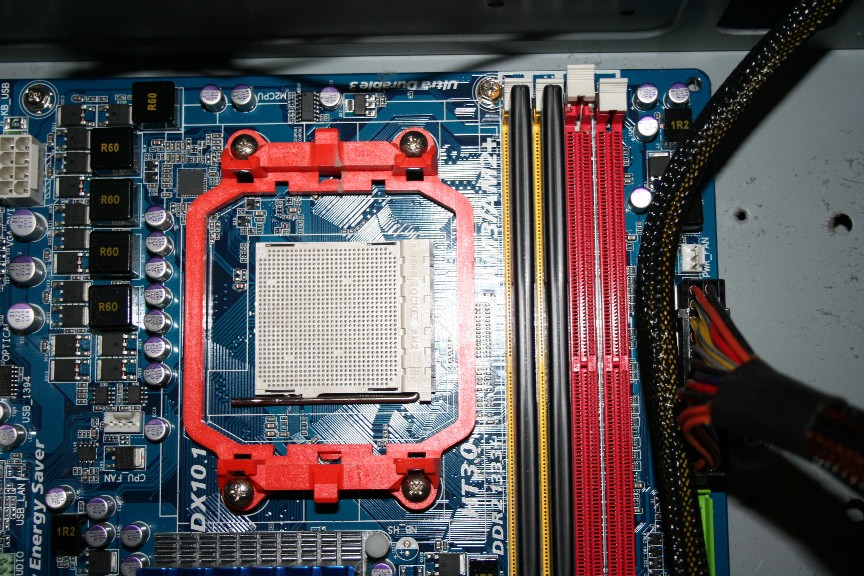
Here is a picture of the original dual core CPU with the stock CPU cooler.
I purchased the GeminII CPU cooler to replace the stock cooler because the GeminII cooler has a better track record of being quiet at higher loads. To use the GeminII cooler though you need to remove the stock bracket (the orange bracket below). The problem is in order to secure the GeminII cooler and its bracket to the motherboard you need to install a secondary bracket directly underneath on the underside of the motherboard. This would have required me to unscrew the motherboard from the case as well remove/unplug the various expansion cards/cables. This is something I really didn’t want to do and didn’t want to risk that something would get screwed up, so I decided to skip using the GeminII cooler and instead went back to the stock AMD CPU cooler.
Once the new CPU was installed Shawshank booted up right away and recognized the new CPU. One process I wanted to test out was transcoding using Air Video. My wife has an iPhone and has had issues with Air Video reliably streaming high bitrate content which required to be transcoded first. Even just streaming transcoded SD Content was pushing the dual core CPU to a sustained 99-100% CPU Usage as seen below. SD content would play fine initially put eventually a lot of stuttering would follow. HD content (such as BluRay rips) would start stuttering almost immediately.
With the new quad core CPU Usage dropped dramatically. There were a few spikes to 100% but for the most part CPU Usage stayed around 40-50% (streaming BluRay rips). Even more impressive I had no issues playing back the opening scene of Quantum Of Solace which with the dual core would just stutter continuously.
Miscellaneous – Diary Of A Blizzard:
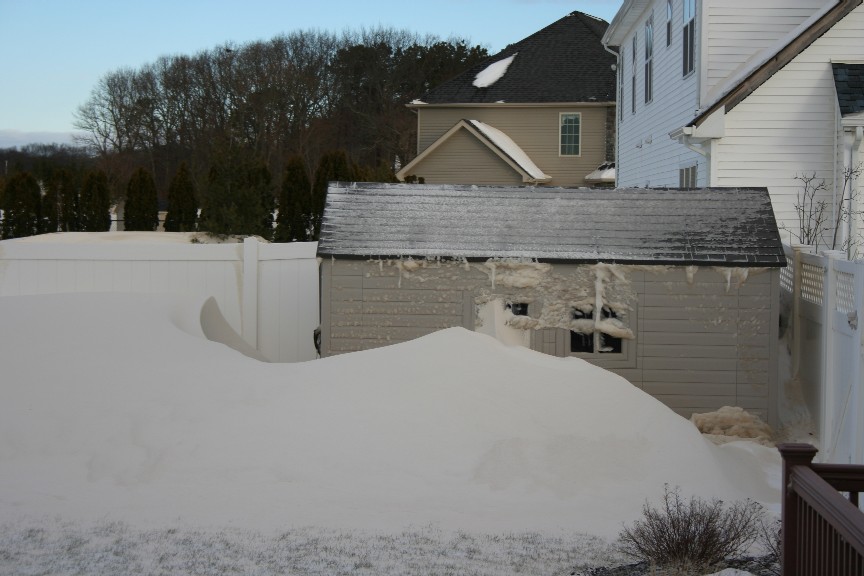
If you live on the east coast of the Unites States you are already aware of the havoc caused by this past weekend’s blizzard. I live right off a wide open field, so under normal circumstances I am subject to above average wind gusts. This blizzard was by far the worst storm I have seen come through when factoring in the wind, with wind gusts easily in excess of 70 mph sustained at times. We actually lost hot water for a day (as well as some of the other neighbors) as the wind gusts were so strong that they were blowing down the chimney chutes and blowing out the pilot lights on the hot water heater. Fortunately my house did not end up in The Wizard of Oz, but I thought I would share a few pictures.
The wind took out several sections of my fence. This actually happened after the blizzard passed when the winds actually got stronger.
It is a good thing I didn’t need anything from my shed!
The local road out of my neighborhood two days after the blizzard. The road had been plowed but the winds were too strong and snow kept blowing over from the open field. The amazing thing is I somehow made it down this road Monday morning to go to work (probably not the smartest thing I have done but I made it to work in one piece).
The local road last night after it was plowed. What was a two lane road is now a one lane road with 7 foot snow drifts on each side. The best way to equate driving down this road, it is like the scene from Star Wars where Luke Skywalker is flying through to destroy the Death Star!
Final Thoughts:
So there you have it, hopefully I didn’t bore anyone too much. This is not meant to be a guide of any sort but instead just to show that as long as you are willing to take the time to plan and research what may seem to be an intimidating task can actually be rather simple (and more importantly save you lots of money!). Also, there is definitely a benefit to having a large and knowledgeable community at your fingertips, as I was able to run several ideas on the forum (here and here). This is just another reason why MediaSmartServer.net rocks!!!
On behalf of MSS.net I want to wish everyone a Happy and Healthy New Years. 2010 was a great year for the site and I look forward to seeing what is in store for 2011.











{ 6 comments }
You should have blizzards more often, you get super productive! Nice work Damian, I took was a little intimidated when I decided to cut into my walls to hang the TV and run cables everywhere, but as you say with the proper time, research, tools, and community advice it can be done without too much blood, sweat, and tears.
Good write-up Damian. Just curious but what did you do to take care of the “Fabio situation”? LOL The last blizzard we lived through in December of 1983 produced a lovely daughter in September of 1984.
We had a quick beer and then I sent him on his way!!!
My wife is a labor and delivery nurse, I will remind her that in 9 months things will probably be very busy at work for her!!!
I hope the TV is not centered on a stud…. That will force the center in-the-wall speaker to have to be off-center! (Been there…!)
Hey John – I was thinking about that last night actually. The TV mount plate (which should be approx where the center of the TV is) should be in the center in between the studs, so hopefully I should be pretty spot on with getting the center channel to be centered as well. My order should be arriving tonight so I will know soon enough!!! My wife should be scared lol
Heh, welcome to the great winter of 2010-2011! I had a yard in my yard when I realized that my yardstick did not quite poke out of the snow anymore! This was in CT , near Hartford, of all places. Sidewalks look like WWI trench systems and there are snowbanks from the plows that cover to bottom part of the road signs! Hell’of’a winter.
{ 1 trackback }