With the family out of town this past weekend I had the house to myself to do whatever I pleased. Aside from watching 3 movies (considering I average watching 1 movie maybe every few months not too shabby!) I decided to tackle the project of pulling some recorded shows I had sitting on my cable box onto my PC (most notably Mickey Mouse Clubhouse and Married…With Children, both HD). I am able to record these shows on my PC via TV tuners, however for these channels (Disney and TBS respectively) my TV tuner can only pull in the SD and not the HD channel (I have found the SD content my TV tuner records to be of poor quality). I figured while going through the process it may be worth documenting and posting here. There are probably many ways to go about this (not the recording content off a Set Top Box part but what to do with the file afterward) but this method seemed to work best for me.
Tools Used:
- Set Top Box (Scientific Atlantic 8300HD)
- Hauppauge HD-PVR along with included TMT Extreme software
- Video Redo (optional, used for video editing)
- Handbrake (optional, used for video encoding)
Setting Up:
For those who don’t know much about the Hauppauge HD-PVR, it is a device that allows the use to take advantage of the analog hole (simply put it allows the user to copy digitally protected content freely). According to the Hauppauge website:
HD PVR is the world’s first High Definition video recorder for making real-time H.264 compressed recordings at resolutions up to 1080i. HD-PVR records component video (YCrCb) from video game consoles and cable TV and satellite set top boxes, with a built-in IR blaster to automatically change TV channels for scheduled recordings. Audio is recorded using two channel stereo or optical audio with five channel Dolby Digital.
The HD PVR is a fairly small device, not much wider then my hand. On the front of the device you have access to composite video in, audio in, and S Video in.
On the back on the HD PVR are both inputs and outputs for component and optical, an input for the optional IR blaster, USB connecter, and DC in.
 Connecting the HD PVR to a device for capture (in my case a cable box) is very easy. One key item to note is that if you want 5.1 audio captured you must connect using optical, otherwise you will only get 2.0. So for my setup my connection went as follows:
- Cable Box component out (Green/Blue/Red) to HD PVR component in
- Cable Box optical out to HD PVR optical in
- HD PVR USB out to PC USB in
Once everything is connected simply install the provided installation disk on your PC (make sure to install all available options/software, I set up using Windows 7 x32) and in a few minutes all necessary software/drivers should be installed (you can also find the latest drivers/software here).
Capturing Video With The HD PVR:
With everything now set up, it is time to capture some video. With the cable box, HD PVR, and PC all turned on, run the TMT Extreme program from your PC.
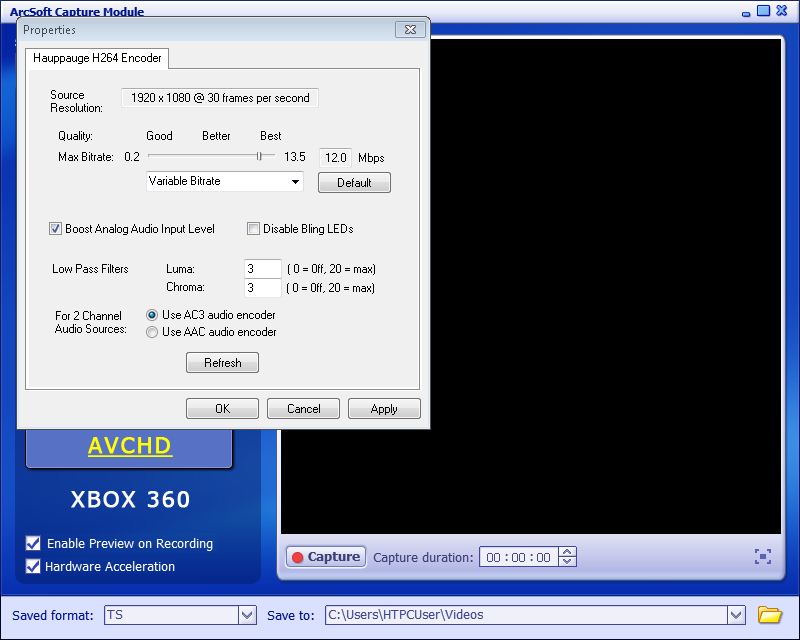
There will be four icons to choose from, for capturing video click on the first icon to the left (a video tape). This will bring up the Arcsoft Capture Module. If the HD PVR was set up correctly it should be automatically detected and in the preview window you should see whatever is currently playing back on your cable box. From here there are several things you can choose from. If you are connected via optical make sure the Audio input is set to S/PDIF and PC Audio Mode is showing as 5.1 channels. There are three settings you can choose from as your output file, m2ts (Playstation 3), ts (AVCHD) and mp4 (Xbox 360). I chose to go with AVCHD as I found ts files t o be the most flexible for any editing/encoding I may do.
The only other setting I adjusted is under the “Format Settings” button. Here you can specify the Max Bitrate (i.e. Quality) that should be applied to your recordings. From reading around on AVSForum I decided to go with 12.0 Mbps set at Variable Bitrate. It is subjective though what settings the user chooses as the greater the bitrate that better the quality but the larger the file size.
Once all the settings have been set to the desired level, the last step is to actually capture the video. With the video playing from the cable box (or whatever device is being used) simply click the “Capture” button. Now keep in mind the HD PVR is capturing the live video feed, so if the video you are capturing runs two hours long the process to capture the video will also run two hours long. Also, if you mess around with the live feed (start fastforwarding, rewinding, etc… that will also get captured). Once you are done simply click the “Capture” button again and you should now have your recorded content saved on your PC, it is that easy!
Editing/Encoding
From this point forward everything I did here is completely optional and there are many different ways to go about it. There are two reasons why I like to edit/encode my captured video. The first reason is to cut out commercials. Since commercials are most likely part of the original video feed it will be part of the capture as well (of course for TV shows this would apply, for movies from premium channels such as HBO this would not be an issue). The second reason is because the filesize is much larger then I like (for TV episodes, for movies the filesize is less of a concern). For example, capturing a single HD episode of Married…With Children resulted in a ts file approx 2GB large, much more space then I am willing to dedicate to an episode (especially once you factor in the number of episodes per TV show).
1. Editing:
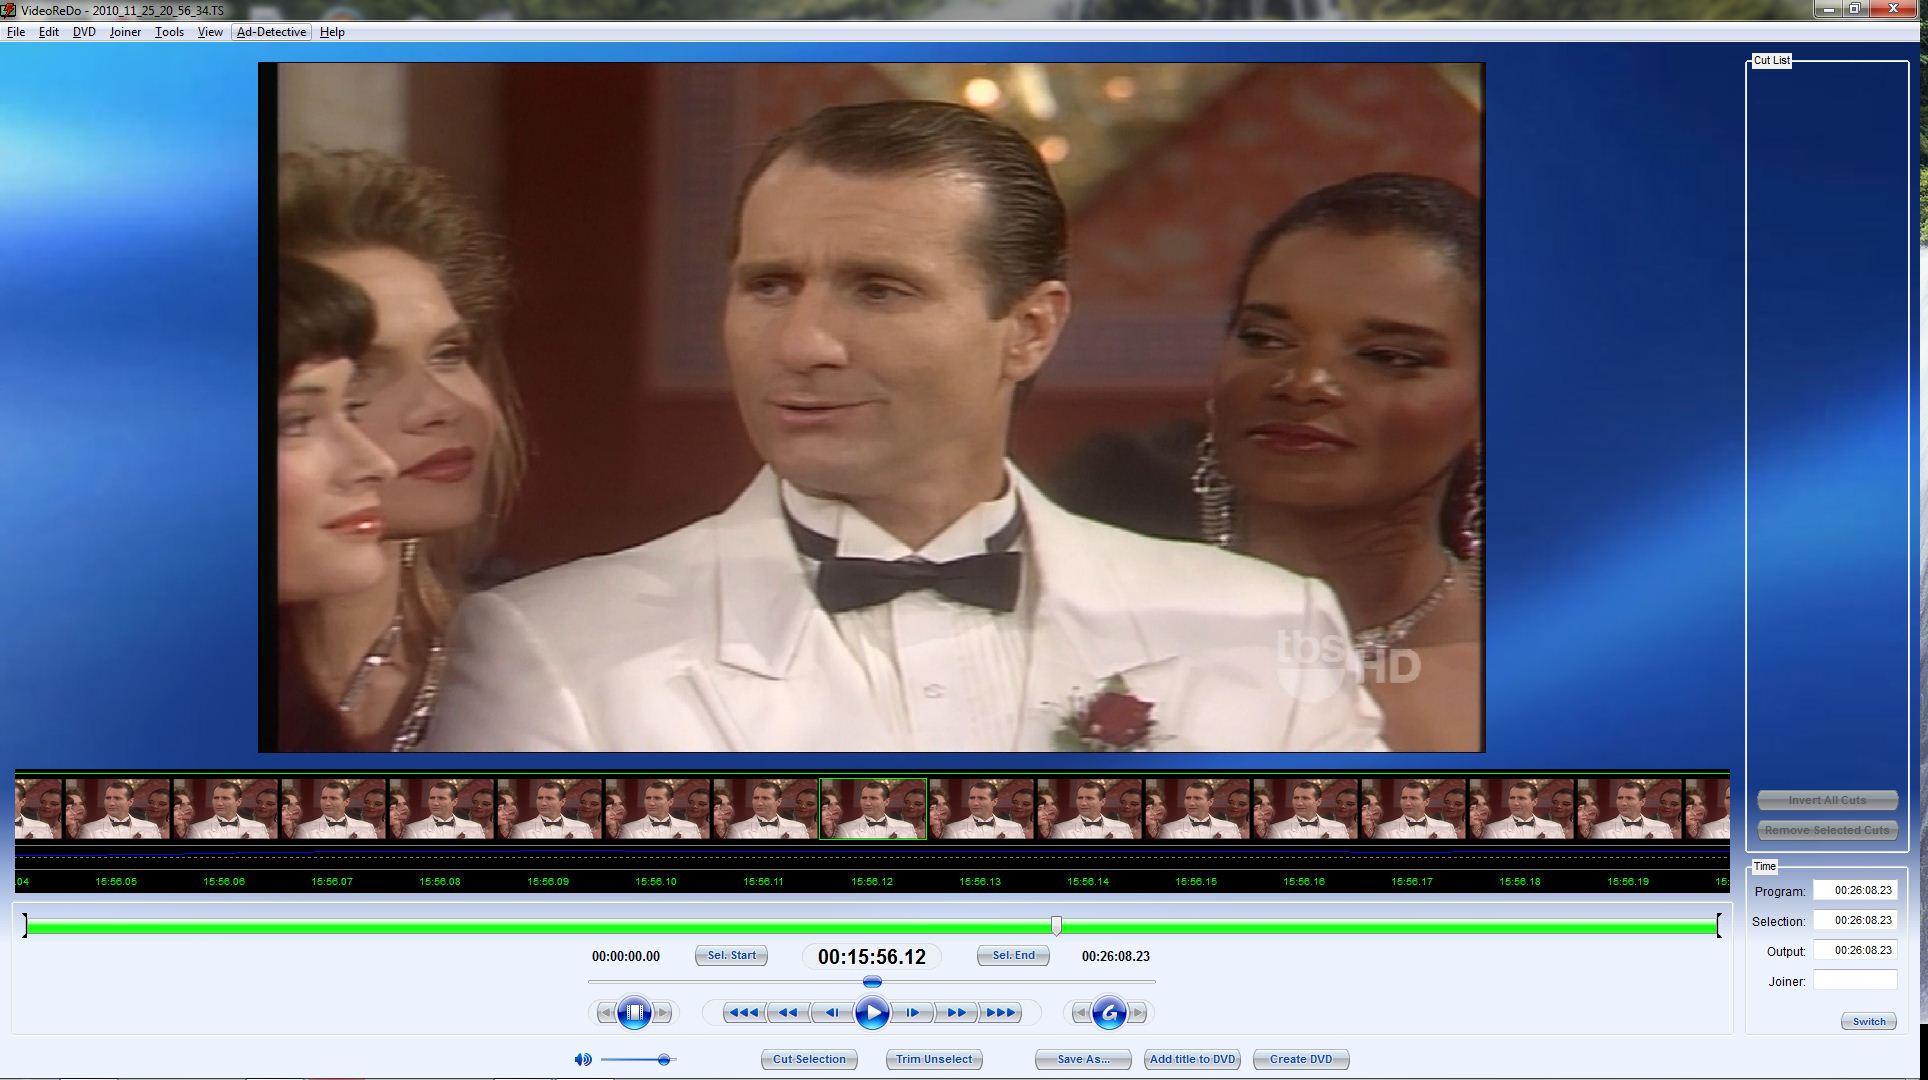
For editing the ts file I tried several programs with little success until I came across Video Redo. To be able to edit the ts file with Video Redo you will need the TVSuite H.264 version. The price may be a little steep for some (approx USD 100) but there is a 15 day full trial that can be used (in fact I am using the trial for this writeup). It is actually dead simple to use. After installing VideoReDo simply open the ts file that you want to edit. After the file has been processed you should see a frame by frame preview.
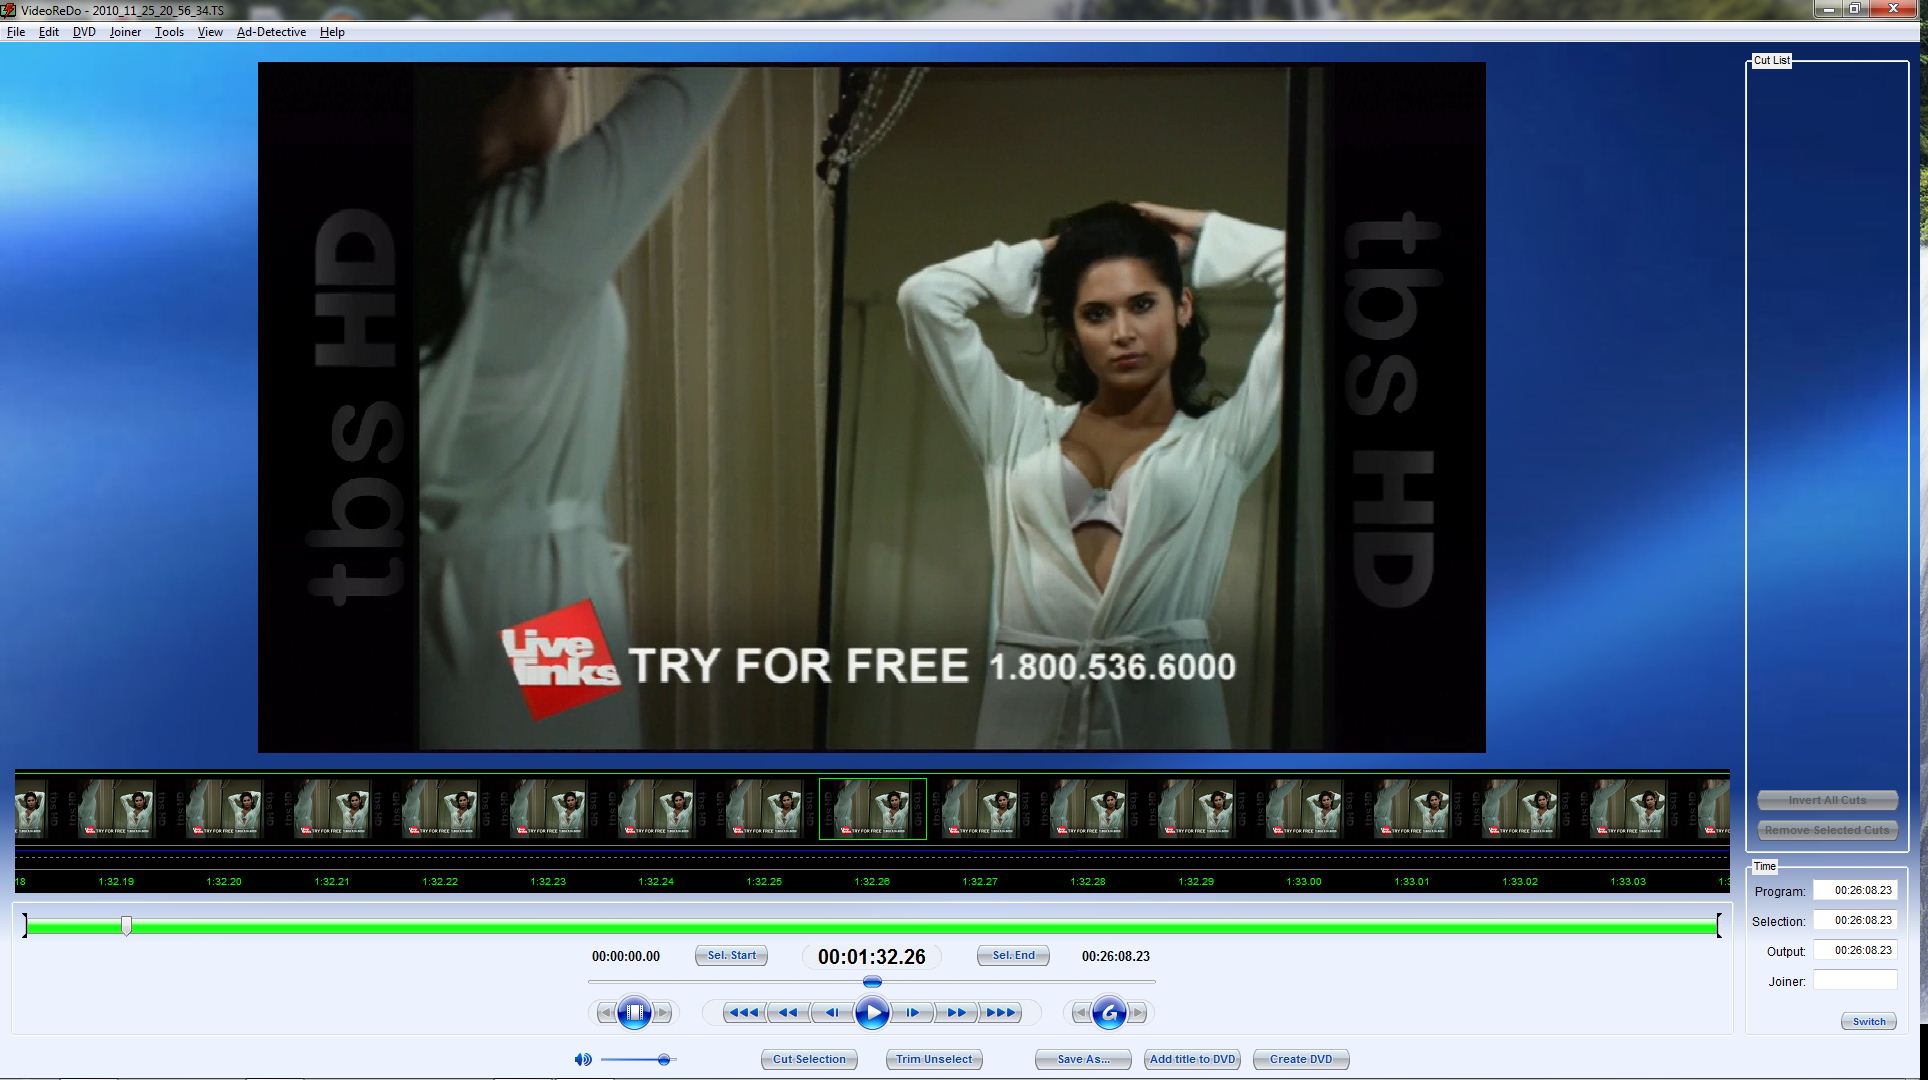
Scanning through the video I simply look for any commercials, which I can then select and tell VideoReDo to cut out (such as below, how did she get in there!). Once all my cuts are selected VideoReDo will output a file commercial free.
There is a lot more you can do with VideoReDo then what I am highlighting, but since my purpose was just to quickly cut out commercials that is the only area I delved in to. VideoReDo does have some sort of Ad detective process which attempts to scan and cut out the commercials automatically (I think it looks for scenes that fade to black and assumes that is a commercial break). However I found it wasn’t entirely accurate and doing it manually gave me 100% success rate in little time.
2. Encoding:
Once commercials have been removed, the last step I want to do is encode the file. As I mentioned earlier, the main reason for doing this is because some TV shows can easily have in excess of 100 episodes, so managing the file size becomes more important. There is no right way to encode as there are tons of different settings, choices, etc… For example, I wanted a file that I could play on all my HTPCs/digital media players in my house but could also play natively on iPods/iPhones without the need for transcoding, so I decided to go with an m4v file. Handbrake is a great little program for encoding, and the “Universal” Apple preset fit exactly what I was looking for. With Handbrake you simply open the file you want to encode, choose the present you want to use (or create your own custom setting), and then let Handbrake do the rest (keep in mind that encoding is a CPU intensive process so the more capable your CPU the quicker the encoding will take).
One thing worth pointing out, if you look at the screenshot above you will see that under Video Filters I have “Decomb” set to Default. What decomb does is it deinterlaces frames that are visibly interlaced. To be honest much of this video jargon is foreign to me, so instead of trying to explain (and probably doing so incorrectly) and I will try to show with some screenshots.
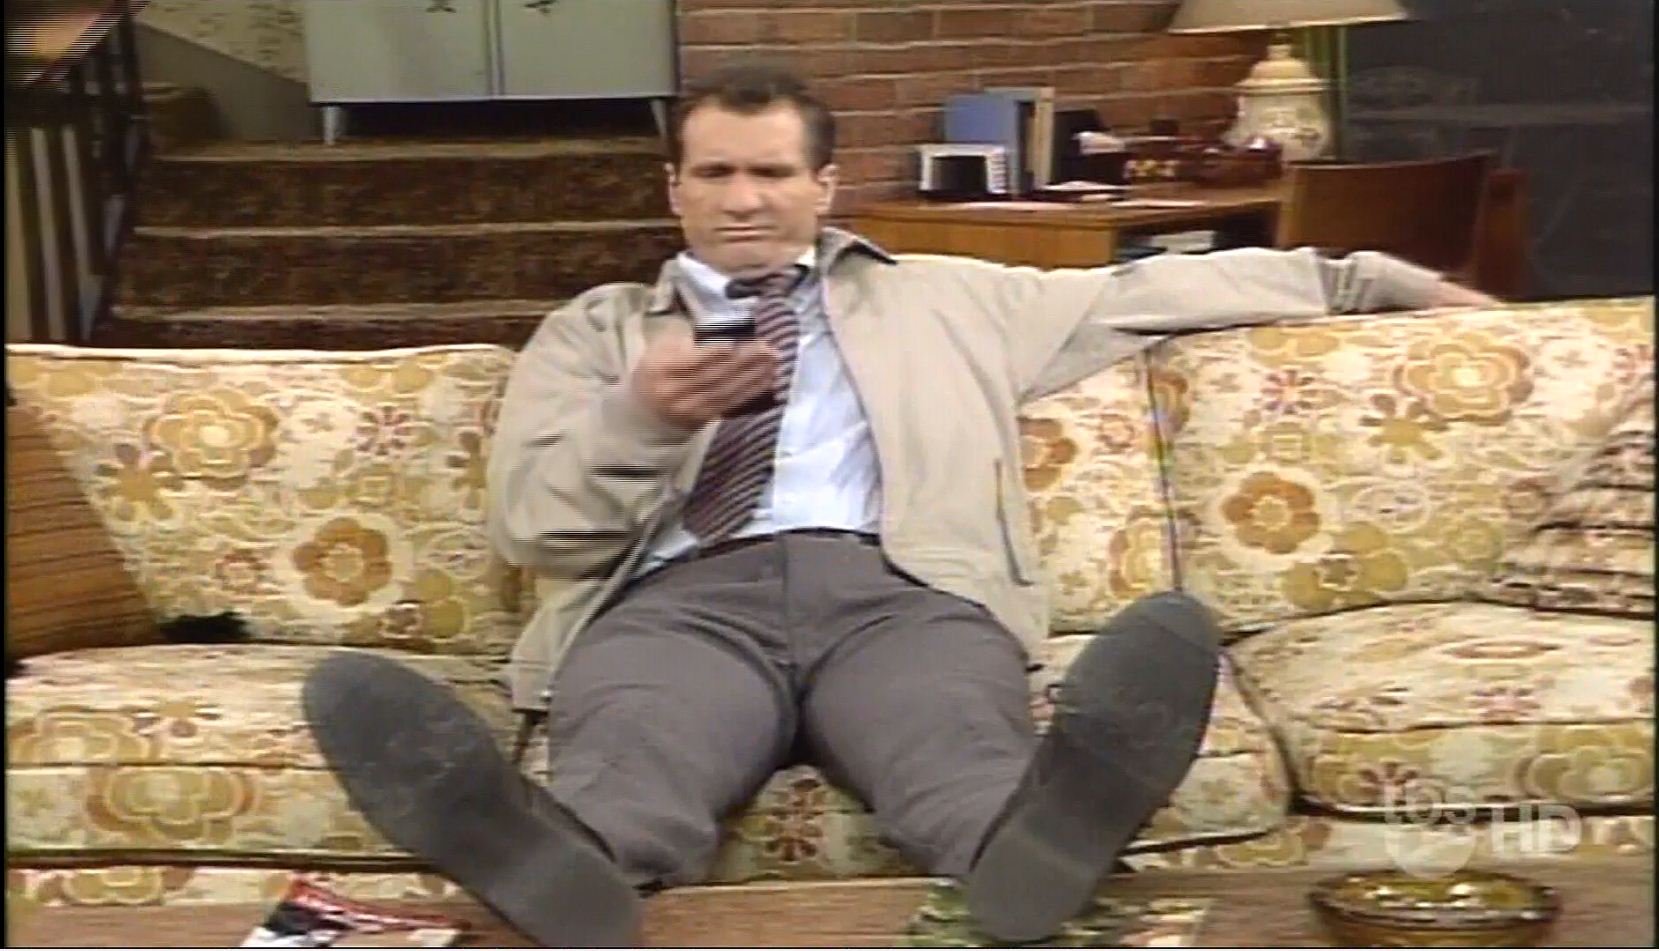
Below if a screenshot of interlaced content. If you take look specifically at Al’s hand holding the remote and the banister in the upper left hand corner you will notice what appears to be horizontal lines going through the image (the way I describe it, it looks like you are watching the TV through window blinds).
The same video clip, but with decomb enabled you can see the horizontal lines have been removed.
Since the recordings the HD PVR captures are 1080i (“i” meaning interlaced) using the decomb setting ensures that I have no interlacing issues. For more detailed information about interlaced content check out this excellent guide put together on Handbrake. You can also find out more information about decombing here.
Once Handbrake is complete I am left with an approx 300MB file instead of the original 2GB file. It may not be a 1:1 copy of the original but for how I mostly watch my TV shows it looks great and is compatible across a variety of devices in my house. Of course the final file size and quality will be dependent on the settings used and the original source content.
Final Thoughts:
So as you can see this is not really as detailed a guide as I typically write, but hopefully just serves as a brief introduction into capturing and editing TV content. There are many other ways you can go about this process. For example, you can use the HD PVR in combination with Windows Media Center or SageTV to record live TV (you can see a Geektonic writeup on using the HD PVR with SageTV here). Since most of the TV I watch and record is local content which is unencrypted (i.e. CBS, NBC, FOX) I can instead just use a TV Tuner card to record my shows instead of relying on the HD PVR (right now I only use the HD PVR to record content that I cannot access via my TV Tuner cards as the HD PVR doesn’t really fit into my entertainment center currently). As far as removing commercials, there are several great programs such as Comskip and ShowAnalyzer that can monitor your recordings and once a recording is complete analyze/mark where the commercials are (and tools such as MCEBuddy or DVRMSToolbox can then read those commercial markers and cut out the commercials). The commercials can actually be left in but the commercial markers read and skipped over during playback (there are plugins for SageTV that can do this as well as being possible with Windows Media Center). Like I said, I am just scratching the surface here ![]()
UPDATE – A new HD PVR is in the works which will actually take the box out of the equation and instead provide all the functionality of the current HD PVR but in the form a a TV Tuner card. See more here.


{ 27 comments }
Damian,
Excellent guide, as always
One suggestion I have for cutting out commercials is the Split and Join feature of either MKVToolNix or tsMuxer. (Prefer MKVToolNix as it can also be used to generate a MKV by joining the split parts later) This avoids the need to re-encode after removing the commercials.
While I agree it is easy to do auto-commercial detection with the payware software, what I would do is to note down the timestamps at which the commercials appear and then follow the steps below:
1. Use the Split feature in MKVToolNix: http://www.bunkus.org/videotools/mkvtoolnix/doc/mkvmerge-gui.html#global_split
Just load the TS file in the add file option and change the file name at the bottom to something else.
Then, for example, if the commercials are in two batches between 600-720s and 1200-1320s, you should first enable ‘Splitting’ in the 3rd tab (Global options), and click on the radio button for the Timecodes. Entering 600s, 720s, 1200s, 1320s after making sure that ‘Link Files’ option is turned off (it is off by default), and then clicking on ‘Start Muxing’ will give you 5 MKV files with -001.mkv, -002.mkv and -003.mkv extensions. The videos in -001.mkv, -003.mkv and -005.mkvs are what you would be interested in. You can also enter any number of timecodes separated by commas, and the number of MKV files generated varies accordingly.
Once you get the MKV files with just the stuff you are interested in, load up MKVToolNix again, add the first file, then click on ‘append’ and add the second file (-003.mkv) and then another ‘append’ and add the third file (-005.mkv). Change the filename at the bottom to the final file name you want, and you are all set!
You just saved some encode time with HandBrake
Hey Ganesh,
You know what, I have used mkvmerge to split off clips/samples, but never thought to do it for commercial removal. Also, I only have about 7 days left on my VideoReDo trial so free is good
Damian,
Need a couple of edits in the hastily written reply at the top, but I hope readers get the drift.
One thing you need to remember is that the output video is not re-encoded. So, if you have interlaced content at the source, it will be interlaced content which is output. Better have a good HTPC which can playback HD interlaced content reliably (most media streamers don’t do sucha great job with such content).
Damian,
With this box will I be able to transfer from Windows 7 Media Center to my DIY
WHS and play on my Popcor Hour? Other then network I mostly record from the History, Sci-fi A&E and Food Network.
Don,
If you use this box with Windows Media Center all your recordings will be unencrypted which means you can play on any device. However, the only issue is I am not sure if the Popcorn Hour supports the wtv format (using the HD PVR with WMC I believe the recordings would be H.264 WTV), which is what WMC records in, so you may have to switch to a different format after the show has been recorded. You can also try using SageTV, which I think would record as a H.264 MPEG
I use TIVO. It will auto download from the TIVO DVR to my WHS. It is in a TIVO format. HD by the way. Both TIVO’s in the house can see and play all the TIVO files on the server. I use a small program called DSD to convert TIVO files to MPEG if it is something I want to keep or watch on the PCH. PCH cannot play TIVO files. I think that the TIVO files is just an mpeg formated movie with a TIVO media key somehow embeded. Thanks for the advice on the commercials. I have been searching for an easy way to do it
I have a TiVo Premiere with CableCard (and an older Series 2 next to my Verizon STB), and if you have a Macintosh you can use a dashboard widget called “Now Playing” to display your list of shows from either box and perform a single-click download-and-decrypt. Now Playing is just a (free) wrapper around other free/open source software, but it’s just outstanding in its simplicity.
The resulting .mpg file plays perfectly in VideoLAN client with deinterlacing turned on.
Damian, nice write-up as usual. I’ve been using a HD PVR box since its release and it’s the only box of its kind that captures 5.1. The competing AVerMedia box only does 2.0. But, with your method, you’re actually re-encoding twice: once when the box is capturing (it’s really re-encoding) and again when you use Handbrake. So, there is quality loss and don’t forget cable/satellite providers already compress quite a bit these days. What I do is capture at 720p (setting my Dish DVR to output 720p) using a constant bit rate setting at 8. This results in decent quality recordings that aren’t too large. Then, I just H264_cutter (freeware) to cut ads out.
Brajesh,
Well, don’t forget one of my requirements for the shows I was grabbing (mostly Mickey Mouse clubhouse and other kid stuff) was to make sure I could get universal support, as well as mobile support for iPxx. That is the main reason why I encode down, and animated material such as Mickey Mouse lends itself well to encoding down while maintaining PQ. I just take on a case by case basis, there are some shows where I want to retain the original quality and for those I will take the storage hit
Ah, ‘Mickey Mouse Clubhouse’…you must have a small kid or two :). My kids (5 and 2) love watching this off my Boxee Box and their WD TV Live Plus.
Yup, 3 and 1 yr old boys, MMCH is a must!!! I actually have just about every episode recorded on my PC via my ANalog TV Tuner, but the HD version I get from my cable box (even after encoding) is much better quality, so I am slowly replacing the Analog versions.
Most of my recording I can do from my PC via my QAM tuner since I get all the local broadcast HD channels. The HD PVR comes in handy though for those channels I cannot get with my Tuner
Also downloaded and tried Videoredo. Works FANTASTIC. Going to buy, I think it is well worth the money
Yeah, it really is a great program (and i am sure there are a ton of features that I haven’t even tried yet). What I really like is that you can get a FULL 15 day trial, whereas many video editing programs I have tried in the past trials are usually restricted in some fashion (there is no way I would spend money on software if I cannot try it in full first) Pricey but if you do a lot of video editing it seems to be top notch and worth it
What is the difference, for example, in the save menu from a mpeg ts and the h.264 ts file format. I know the latter takes much more time to complete.
Not sure, I know the m2ts takes up more space then the ts. I don’t know if the PS3 can only play back m2ts files and not ts files (which may be why the m2ts option is labeled PS3)
Damian,
I have ordered this unit, I have TWC and have the Scientific Atlantic 8300H
DVR and plan to use with Windows 7 media center. I know this may sound stupid but I cant find were the remote sensor is on my box, can you tell me were you placed the the ir blaster sensor on your box.
Regards,
don
Don,
The IR sensor on the HD PVR is on the front of the box. Also, the IR Blaster output line is on the back of the box (if you are running an IR blaster from the HD PVR to the CableBox). Another option to control the Cable Box is to use Firewire which is supposed to be much better then IR. I haven’t had a chance to attempt setting up though
Hi Damian,
Excellent Review and thanks for sharing this.
Your daily faithful reader of your blog.
baksharp.
Here is how I do my HD PVR captures.
1) Record video @ 720 P (1080i is really a waste of time for broadcast video)
2) Cut out commercials with videoredo.
3) take the resulting edited TS file and open up GDSMux (it is installed when you install Haali Media Splitter) and drop that edited file into it and save it at a mkv. The results are a perfect mkv with zero recoding.
H264_cutter is a decent free alternative, but VideoRedo is definitely nicer.
VideoRedo I definitely found to be the creme of the crop. It just comes down to the price, as it is rather steep if you are only looking to edit a small handful of files (my trial period expired and I haven’t decided if I will purchase)
Damain, out of curiosity, how long did it take you with Handbrake to re-encode your 2GB capture down to the resulting 300MB file? I’m trying to decide if it’s worth doing. I have a quad-core Win7 PC w/8GB RAM. Thanks.
I think it took me about an hour to do so. This was for 1/2 hour shows (Mickey Mouse Clubhouse) using the Universal Profile (m4v). I have a quad core Q6600 Win7PC w/ 3GB RAM
The main reason why I decided to encode is that keeping TV Shows at the original size will end up taking way too much space (when you factor in you could easily have 20+ episodes per season). It is worth trying out and seeing if you are happy with the results. Mickey Mouse Clubhouse looks just as good as a 300MB file as it does a 2GB file (viewing on a 58″ TV). Other content may vary how well it encodes.
Thanks, 1+ hours for a 30-min show is worth it considering you’re getting about 85% savings in file size. I’ll try it out for my ‘Mickey Mouse’ caps and other kids shows.
Yeah, I just do it in bulk and let it run overnight so it doesn’t affect normal PC usage
Hey Damian, quick question for you…Do you need a 5.1 sound card on the PC being used in order to capture 5.1 audio? Thanks for the writeup and all the follow ups
Hmmmm… good question. I don’t think you need a 5.1 card to be able to capture 5.1, but tbh I have never tested otherwise
{ 1 trackback }